 |
| Happy Cricut cutting |
You have probably come here because you have Cricut Calibration problems - sensors are not reading cut marks.
So by the time you have got here you might have already followed the troubleshooting advice on the Cricut page and the MANY tutorials/help videos from Cricut and other third party lovelies on youtube etc.
In case you haven't yet, try:
Cricut calibration tutorial
Cricut troubleshooting
Youtube help: Charming Lotus and Jenuine Crafts
The common things to try are the following....
- Print with black and white printer settings
- Print on white paper
- Print on correct sized card (I use A4)
- Check paper clean
- Check mat is clean
- Clean the sensors
- Move sensors (Cricut machine) out from direct sunlight or overhead spotlighting
- Draw over the cut markers with a Sharpie/Black pen (which sounds bonkers but works for some)
- Check print settings are at 100% scale - NOT 'shrink to fit' or 'fit page'
- Change browser - Safari, Explorer, Chrome, Firefox
- Check Firmware is up to date
- Uninstall/reinstall the Cricut plug i from your computer
- Unplug/change USB
- Unplug/change power cable
- Try with another computer
I did all of the above and no avail. I tried the calibration over 15 ties with different variations on the possible issues. The man on Cricut web chat was trying to get me to do them all again, not sure if he really read my descriptions of the errors or the list of solutions I tried, anyway he tried to get me to do them again, before abandoning the chat twice.
So I was giving up, I was in tears, I had wasted the only 3 daylight hours a week I get childfree to work. I then wasted a further hour while I really should have been supervising the kids (I bribed them with donuts and Blaze and the Monster Machine on Netflix). I was buying a Silhouette Cameo. But techie husband suggested we try one last time.
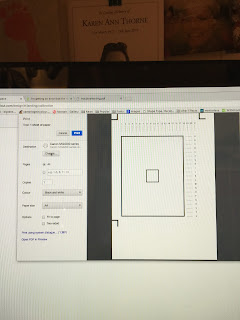
He patiently went through the steps again and I noticed something. The calibration print sheet was printing to the left edge but those I saw on youtube were central, as was the graphic on the calibration guide. I checked my print settings they were all fine, however the print preview showed the markers were positioned to the left.
I tried again, same settings, this time it printed tiny?? this was a one off, the only one is over 17 prints. THIS IS NOT RIGHT. This might just be where we are struggling.
From the pits of my memory I remembered seeing a PDF version of the calibration print sheet on a help page.
I found it, the PDF and the print preview had it positioned in the centre of the page! I printed it, it was central and hey presto it allowed me to calibrate the machine. WTH was that all about? I don't know, I'm going to send this the Cricut and will let you know as and when I hear back from them.
Hope this helps!
and big thanks to The Charming Lotus and Jenuine Crafts
PDF link: http://help.cricut.com/sites/default/files/2016-08/Calibration_1.pdf
I love my Cricut btw - if you are wanting an opinion on it - as a home studio user it is great... could be quicker, could be wireless, would be so much better if the design studio wasn't dependant on an internet connection. The newer version of this model can be used wireless via bluetooth, does have a fast cutting mode (which is raved about by other users) but still needs the internet if you are creating your own designs, which I do.
 |
| Messy wall studio pre makeunder - happy Cricut Days |


